Monday, September 30, 2013

Peppermint Stripe Soap


Finished Bars
I have been trying to get soaps made for the fall and Christmas seasons.  I finally got the last of my colorants in that were ordered.  I started by making a 5 lb batch of soap from olive, coconut, palm kernel and sunflower oils.

Samples in the mold
After measuring out the water and lye and mixing them.  I measured out my oils.  After getting everything measured out, I added the lye mixture directly to the oils and started blending.  Mixing the lye with the oils without melting the oils is my new favorite way to soap.  I find that I have better control over the thickening.  I also added the peppermint oil at this point.  It thickened really quickly.

The second layer going on

I topped the soap with piped stars
I started out using squeeze bottles to fill the molds, starting with the sample mold.  This helped me get things started before the mixture thickened up too much.   I was able to fill the entire sample mold with the squeeze bottles.  I also started out filling the regular mold with the squeeze bottles.  After the soap thickened up I used a rubber spatula to gently spoon the soap into the mold and spread it out.  This was a little tricky because the soap didn't want to be spread.  I did manage, but it took some careful maneuvering.

Love the suds
After I got most of the soap into the mold, I put the last of the soap into the mold by making stars all over the top of the soap in the mold.  This adds to the appearance of the soap.  I let the soap sit for about 5 hours in the mold without any insulation.  When I went to pull the soap out of the mold it had already hardened enough to pull it out.  After I pulled the soap out of the mold, I then pulled it out of the liner to let it dry a little more before slicing.  I sliced it the next afternoon.  I only had one problem with slicing and that was the fact that for some reason the stars on top were a little on the crumbly side.  It wasn't a big issue, but it did make it harder to keep the e red striped looking clean.  After I sliced everything, I let them sit for about another 24 hours.  This kept them from being so soft that the soap sticks to the stamp.  After stamping all of the bars, I lined them back up on the rack so that they can finish curing.

All finished and stamped


I am linking with the following blogs:
http://back2basichealth.blogspot.com
http://jillshomeremedies.blogspot.com
http://www.create-with-joy.com
http://teachingwhatisgood.com/
http://cupcake-n-bake.blogspot.com
http://alifeinbalance.net
http://thediydreamer.com
http://www.the-chicken-chick.com
http://lavendergardencottage.blogspot.com
http://www.flusterbuster.com
http://www.time-warp-wife.blogspot.com
http://www.bystephanielynn.com
http://blackfoxhomestead.com/
http://www.iamannekehn.blogspot.com
http://obsessiveandcreative.blogspot.com


Wednesday, September 25, 2013

Pink Grapefruit Salt Bars

Pink Grapefruit Salt Bars
I have wanted to make some salt bars for a while now.  I had the recipe all figured and everything.  Well I finally made them.

Soap with Sea Salt added 
I started by measuring out my liquid, I used half ice and water in separate containers.   I measured out my lye, then I added the lye to the ice.  I poured the water into the container that had held the lye and swirled it to make sure that I had all of the lye before pouring it in with the rest of the lye.  This ensures that I don't end up with a higher super-fat percentage than was planned.

Next I started measuring out my oils.  I used 80% coconut oil along with Sunflower, Rice Bran and castor oils.  Because coconut oil can be drying I used a 20% superfat.  Normally I don't use more than 30% coconut oil in any of my recipes, but the salt negatively effects lather so the extra coconut oil compensates for it.  I also added 2 Tbs of pink grapefruit essential oils as this point.  Note I did not melt the coconut oil at all.
In the mold

I added the lye to the oils and started to blend it.  The color wasn't great at this point, but I wasn't finished.  I blended until all of the oils were emulsified.  At this point I added about 1/2 tsp of madder root powder directly to the soap and blended until there weren't any more lumps.  By this point I was at a light trace.

It was time to add the salt.  So I measured out 40 ounces of sea salt ( equal to the amount of oils).
Sliced and ready

I added the salt in three parts to help minimize lumps of salt in the final product.  Unfortunately I forgot to make sure the salt was free of lumps before I started adding it.  As a result I had to do a little mashing after the soap was in the mold.  It worked but it would have been easier if I had crushed the lumps before adding the salt to the soap.  After I got the soap all in the mold I sprinkled the top with some Himalayan pink salt.  Since the soap is lightly pink due to the madder root the pink salt makes the finished soap look that much better.  I did not force gel on this soap and it didn't heat up like the last several batches have.  Since it wasn't hardening up like it was supposed to, I put it in the oven for about 20 minutes.  This did not make it gel but it did cause it to stiffen up a bit more.

I finally decided that it wouldn't work to cut it the next morning and started cutting.   It definitely got interesting.  I have several small shallow cuts on my hands so handling this soap was a little challenging.  I kept having to wash my hands to get all of the soap off.  I finally got all of the soap cut.  I decided to wait before putting the soap on the curing rack.  I didn't want to have groves in my finished bars, and the bars were still soft enough for the rack to deform the bars.

Just washing my hands with this soap left them feeling amazing!  I think one will be a keeper.


I am linking with the following blogs:
http://back2basichealth.blogspot.com
http://obsessiveandcreative.blogspot.com
http://jillshomeremedies.blogspot.com
http://www.create-with-joy.com
http://teachingwhatisgood.com/
http://cupcake-n-bake.blogspot.com
http://alifeinbalance.net
http://thediydreamer.com
http://www.the-chicken-chick.com
http://lavendergardencottage.blogspot.com
http://www.flusterbuster.com
http://www.time-warp-wife.blogspot.com
http://www.bystephanielynn.com
http://blackfoxhomestead.com/
http://www.iamannekehn.blogspot.com
http://obsessiveandcreative.blogspot.com

Thursday, September 19, 2013

Chamomile Soother

Finished Soap
I made 2 batches of soap on Monday.  One of them was a batch of English Breakfast the other was a batch of chamomile.
Poured in the mold
I started by measuring 10 ounces of water and steeping the tea in it.  Next I measured out 14 ounces of ice and my lye and mixed them.  I measured all of my oils next.  I decided not to melt my oils again.  I had good results with this.  I mixed the tea with the lye and added the remaining water.  After getting a light trace I seperated into 2 parts and mixed titanium dioxide in one and turmeric oil into the other.  I had cut a piece of cardboard to fit down the middle of my mold.  It was definitely interesting to try to pour both colors at once so the cardboard didn't move.
Right after swirling

 I managed to keep the soap fairly even amazingly enough.  After I swirled the soap itself, I mixed a little bit of cappuccino mica with a little glycerin.  I dripped the mixture around the top of the soap.  I used the very tip of a skewer to swirl it around drawing circles on the top of the fresh soap.

I have found that I don't need to insulate my wooden mold.  It almost always gels without any help.  The few times I have added heat it has backfired on me and my soap has ended up overheating.
Swirl after curing


I left the soap overnight to harden and saponify.  After pulling the soap out of the mold in the morning, I cut the loaf in half lengthwise.  I realized after I poured this soap that I should have used 2 dividers in order for the bars to have the swirl in each bar.  I am really pleased with this soap in spite of the swirl division.


Cut bars

Top of the bars


Love the lather
This soap still smells a little funky like tea soaps usually do for the first couple of days, but it should smell really nice in another couple of days.  When I went to trim and stamp the soap last night it had gotten pretty hard already.  I am really pleased with this soap.  It has a lovely lather.  And I am excited to add this soap to my available lineup.


I am linking with the following blogs:
http://back2basichealth.blogspot.com
http://www.jillshomeremedies.blogspot.com/
http://www.create-with-joy.com
http://teachingwhatisgood.com/
http://cupcake-n-bake.blogspot.com
http://alifeinbalance.net
http://thediydreamer.com
http://www.the-chicken-chick.com
http://lavendergardencottage.blogspot.com
http://www.flusterbuster.com
http://www.time-warp-wife.blogspot.com
http://www.bystephanielynn.com
http://blackfoxhomestead.com/
http://www.iamannekehn.blogspot.com

English Breakfast Soap

I made soap today using English Breakfast tea and a little bit of heavy cream.  I love the distinct and wonderful smells of different teas.  English breakfast is a warm, sweet & welcoming scent.  I did not use any other scent besides the tea in this soap.

Loaf split in half
I miss measured the water in this recipe.  I started by brewing the tea in about 10 ounces of water for 2 minutes in the microwave.  This ensures that the tea is nice and strong.  While the tea steeped and cooled, I measured out half of the total water for the recipe in ice and added the lye to the ice.  This melted the ice and kept the lye mixture from getting as hot.  In turn this helps to keep me from getting too impatient and soaping too hot.  After measuring out all of my oils, I re-weighted the now steeped tea and added an ounce of water, before adding the tea to the lye mixture.

Log being cut
I  decided not to premelt my oils this time.  I added the lye mixture and started mixing with my trusty stick blender.  I got the soap to a medium trace and started separating it into separate containers for color additions.  As I got the soap portioned out I could tell that the soap was getting really thick.  After I started adding the titanium dioxide mixed with water I realized that I had mismeasured the water.  The tea part was thick enough that I could spoon it into half of the mold ( separated by a piece of cardboard) that I could literally push it into place with the cardboard.  Then I added the portion that I had tinted with the titanium dioxide.  After the lighter portion was in the mold I added the small amount of soap colored with activated charcoal down the middle of the mold.  After getting all of the soap into the mold, I used a heavy skewer to do a mantra swirl design.

Love the lather
After I got the soap in the mold finished, I filled my sample molds.  I ended up with 21 sample blocks.  These will be sliced and dried for samples both for sale and for people to try my soap.

 I ended up putting the soap out of the mold in the freezer on a cutting board to firm up the soap.  When I pulled the soap out of the mold, the bottom of the soap was extremely soft.  Putting the soap in the freezer seemed to do the trick. I started by cutting the log in half and let it sit and dry for a while.   After letting it sit for about 8 hours I started cutting bars.  I am not using my wooden soap cutter because I need a harder wood for the cutting frame.  Unfortunately I had left the logs sitting on the garbage linier that I had used to line the mold.  This resulted in condensation forming on the bottom of the logs making it extremely difficult to cut bars because my log kept slipping.  This is the reason that this blog post didn't go up on Monday.  I had to give the logs some time to dry so that I could finish cutting the bars.  Life in the fast lane, you sometimes get pushed into the slow lane.  ;)

I am linking with the following blogs:
http://back2basichealth.blogspot.com
http://www.create-with-joy.com
http://teachingwhatisgood.com/
http://cupcake-n-bake.blogspot.com
http://alifeinbalance.net
http://thediydreamer.com
http://www.the-chicken-chick.com
http://lavendergardencottage.blogspot.com
http://www.flusterbuster.com
http://www.time-warp-wife.blogspot.com
http://www.bystephanielynn.com
http://blackfoxhomestead.com/
http://www.iamannekehn.blogspot.com

Thursday, September 12, 2013

Homemade Melt & Pour

I found a great tutorial for making melt & pour soap here.  I used this tutorial to make a recipe for melt & pour and as directions to make it.  

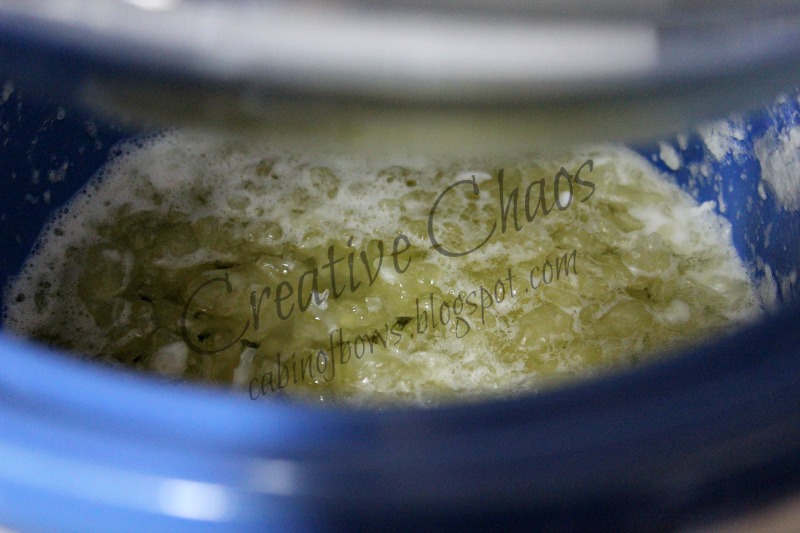
Recipe gelled and dissolving in 91% isopropyl alcohol 
I started by making a batch of soap like normal.  I took the soap to a thick trace before putting it in the crockpot to get it to gel.  After it all gelled, I added the 35% alcohol as well as the glycerin and sugar solution.  After getting everything together I set the temperature to low, put the lid on upside down, put a block of ice in the lid, and draped a towel over the whole sh-bang.
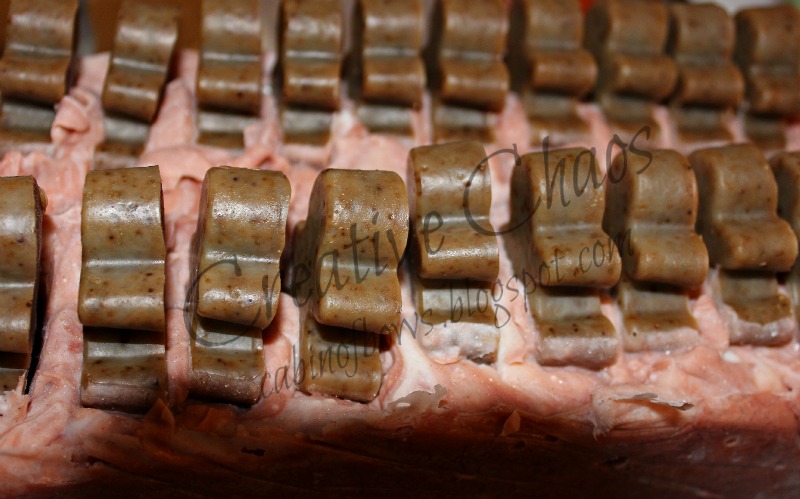
In the mold


I let the soap mixture cook, checking it occasionally to stir and empty the melt water out of the lid.  I did spritz it several times with alcohol to minimize the foaming.  I used
a glass mug in the freezer to test whether it would thicken up.  After the soap was clear when I dropped it on the base of the cup and thickened up I put it in molds.  I promptly put these molds on the top shelf in my refrigerator freezer.  According to what I have read cooling the soap as quickly as possible helps to keep the soap clear.
In the freezer


After I got everything solidified I started remelting everything in the crockpot to remover extra water.  After making sure that everything was melted down and it cooked for about an hour to an hour and a half I decided it was time to start molding again.

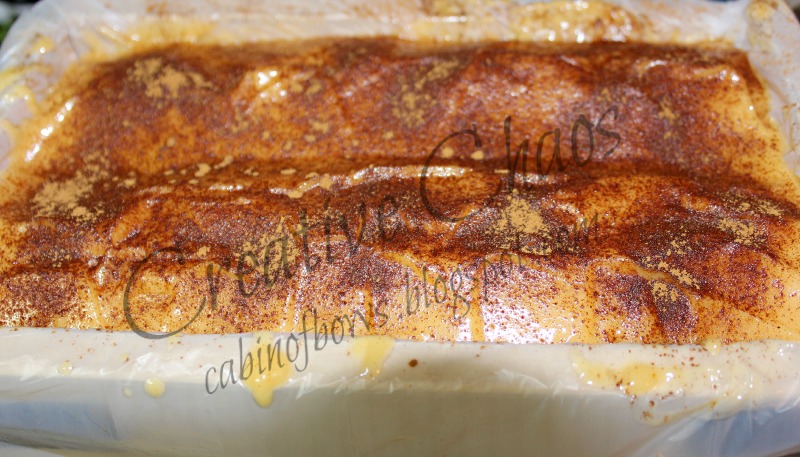
This time I decided to use plastic wrapped around the same tray.  I put it in the freezer until it solidified.  After that I wrapped the top with plastic wrap and put it back in the freezer.  Then I wrapped the tray with plastic wrap and refilled it.

Remelting to remove some of the liquid
DON'T leave the crock pot on!  Please!
I had tried to add titanium dioxide to the first round and it had a texture like a marshmallow.  It looked like a marshmallow too.  I added this white melt & pour to the remaining clear melt & pour hoping to get a better texture from the white.  I thought that I might have just added too much titanium dioxide.  Unfortunately trying to do too much at once will almost always backfire on you.  It certainly did in this case.  Please, please don't forget to turn off your crockpot when you are planning to.  This was the result of forgetting and
leaving the crockpot on overnight.  Let me tell you it was a massive mess.  Not only did I have soap all over my counter, but the soap that didn't boil out of the crockpot ended up caramelized on the bottom of the pot.  It was a MESS.  
On a positive note,  the soap I put in the freezer solidified nicely.  And I can still use the soap that boiled out for cleaning.  Now I can start thinking about other things to make from my melt & pour.  Right now my bars of melt & pour is in bars on my curing rack so that a little more of the moisture can evaporate.


I am linking with the following blogs:
http://back2basichealth.blogspot.com
http://www.create-with-joy.com
http://teachingwhatisgood.com/
http://cupcake-n-bake.blogspot.com
http://alifeinbalance.net
http://thediydreamer.com
http://www.the-chicken-chick.com
http://lavendergardencottage.blogspot.com
http://www.flusterbuster.com
http://www.time-warp-wife.blogspot.com
http://www.bystephanielynn.com
http://blackfoxhomestead.com/
http://www.iamannekehn.blogspot.com

Tuesday, September 10, 2013

Gingerbread Men

Finished Bars

My soap for the little men
Filling the mold
I found a silicone gingerbread man pan on clearance this summer and my first thought was that it would make an awesome Christmas time soap.  So I started by making a small batch of soap a few weeks ago.  I poured the batter into the mold and tried to get it to gel on its own.  It didn't work because the size of the figures was so small, so I put the entire pan in the oven for 30 minutes at 170*.  This did the trick.  After putting the mold in the freezer for about an hour before un-molding.  The freezing helped make them firm enough to pop out of the mold without breaking.
Pouring the soap

I love all of the little gingerbread men
As you can see from the picture here the gingerbread men started out fairly pale.  After a couple of days the little figures darkened up quite a bit as you can see.  I did trim the back surface to make it look better.  These were set aside while I made the recipe for the base soap.


After a couple weeks of curing
My soap mix before coloring
I decided to use the red clay that I had on hand for the red swirl and I used some titanium dioxide to whiten the rest of the batch.  After measuring and mixing the oils and mixing the lye water, I let the lye water cool.  I had used about 2/3 of the water amount in ice which speed up the cool down.   I also didn't heat the oils  a whole lot.  As you can see it blended up nicely.  After getting trace, I split the batch in two parts.  I added about 2 teaspoons of  titanium dioxide to one half and about 1 teaspoon of the red clay to the other half.   I used an in the pot swirl for this batch.

samples in the mold

After I got the mold filled to my satisfaction I started working on my sample mold.  I added my cut pieces of the gingerbread man soap to the remaining soap.  I very gently pushed the pieces into the batter being careful not to mix any more than absolutely necessary.  I didn't want to mix my swirl until it was not a swirl any more.
In the mold


After I gave the soap some time to thicken up I pressed the gingerbread men down into the soap mixture.   I placed everything in two rows so that I would not have any trouble cutting the slices into two bars each.  I also had to leave a little space in between each embed so that I could slice the log.

My gelling set-up
After getting everything molded the soap didn't look like it was going to gel on it's own.  I have a rice pack that can be heated in the microwave.  I heated it for 2 minutes before laying it out on top of my towel and placing all of my molds on top of it.  Then I placed a rubbermaid container over the top of the whole thing.  Then I wrapped the whole thing in a large bath towel.  I did reheat the rice pack once because it didn't look like gel was complete.

I left the soap overnight before unwrapping.  After I unwrapped the soap I let it sit for another couple of hours before un-molding it.  After I un-molded the soap I let it sit and the sides dry for about an hour.  

I started by cutting the loaf length wise.  This left me with two logs.  I scrapped the middle of the two logs where I had cut it to clean up the edges.  I also sliced a thin layer off of the outside sides.  After getting everything neatened up I started slicing the logs with a paring knife.       

My house smells like a bakery right now.  I also now have a rack full of soap curing.  It is a very satisfying feeling. 


I am linking with the following blogs:
http://back2basichealth.blogspot.com
http://www.create-with-joy.com
http://teachingwhatisgood.com/
http://cupcake-n-bake.blogspot.com
http://alifeinbalance.net
http://thediydreamer.com
http://www.the-chicken-chick.com
http://lavendergardencottage.blogspot.com
http://www.flusterbuster.com
http://www.time-warp-wife.blogspot.com
http://www.bystephanielynn.com
http://blackfoxhomestead.com/
http://www.iamannekehn.blogspot.com

Friday, September 6, 2013

Pumpkin Soap


Finished Soap
I added the first colored oils
Sorry this post is late.  My internet was down last night.  :(  I did manage to get some soap made yesterday.  This time I went with pumpkin soap.  Congratulations to Dolly of Dolly Creates for winning a bar on my post Picture Perfect.  I will ship it out as soon as it has cured.

Adding extra paprika oil and you can see I still
have bits of palm kernel oil still unmixed
I started by measuring and mixing my lye water.  I was hoping that this would help to give it the time to cool so that my soap would not trace too quickly.  Then I measured my oils and added 5 ounces of pumpkin puree.  This recipe uses olive, coconut, sunflower and palm kernel oils.  I mixed this all thoroughly with the stick blender to make sure that there were no lumps.  I also added paprika and annatto oil for color.  I was looking for a pumpkin color.  I actually add a little more paprika oil because I wasn't happy with the depth of color.

Color before the lye was added
I added the lye water to the oil and started stick blending.  It took forever to get this batch to come to trace.  I had barely heated the oils and the lye water container was cool to the touch.  I think that this had  a lot of impact on the speed of the trace.  I had to break up the power blending with stirring because my stick blender was getting too hot to touch.  It took about 10 minutes for me to reach trace between alternating blending and stirring.  I finally heated up a rice pad to place under the pot to start warming the mixture.  This assisted in reaching trace.

Trying to get trace
The first layer in the mold
 Once I finally reached trace I started to put the soap in the mold.  I used three layers of soap with cinnamon in between the layers for visual appeal.  I only did one layer of cinnamon in my mold of samples.  This was where it got a little tricky.  You have to be very careful when adding layers on top of a layer.  I started by trying to pour over a spatula.  I am afraid that this disturbed the cinnamon on the top of the first layer.  I gave the soap batter a few minutes to thicken up by putting the first layer in my sample mold and adding the cinnamon.  By this time the batter had thickened enough to add the second layer on top of the first in the sample mold.  After getting the sample mold finished, I went back to adding the layers in my main mold.  At this point the batter was thick enough to not distort the layers.  I added a second layer of soap.  Then I added a layer of cinnamon and another layer of soap.
My samples

 After getting the last of the soap in the mold, I had to give it a few minutes to thicken a little more so that I could texture the top.  After it got thick enough to hold the shape I wanted, I made two rounded loaf type tops.  After I got the top shaped to my satisfaction, I sprinkled it with cinnamon.

All in the mold ready to gel
I re-heated the rice bag and put it under the mold because I was afraid it would not gel and it did want it to gel.  Gelling intensifies color and I wanted the color to be as intense as possible.  It did end up heating the soap hot enough to crack the top of the soap, but it is not a problem because it cracked right along the area I am planning to cut down the middle to cut each slice into 2 bars.  After I cut the log down the middle I will be adding melt and pour (homemade of course) "icing" on top of the loaf.  I will have to wait to post pictures of the bars.


I am linking with the following blogs:
http://back2basichealth.blogspot.com
http://www.create-with-joy.com
http://teachingwhatisgood.com/
http://cupcake-n-bake.blogspot.com
http://alifeinbalance.net
http://thediydreamer.com
http://www.the-chicken-chick.com
http://lavendergardencottage.blogspot.com
http://www.flusterbuster.com
http://www.time-warp-wife.blogspot.com
http://www.bystephanielynn.com
http://blackfoxhomestead.com/
http://www.iamannekehn.blogspot.com

Monday, September 2, 2013

Tallow Soap

Earl Grey Soap otherwise known as Camo soap
I had two brother's having a birthday party last weekend and I couldn't think of anything better than a homemade gift.  So since I am in soap mode, soap it is.  J really likes mint so I made him peppermint soap.  I gave P his choice and he chose the Earl Grey.

My rendering setup
My folks had one of their steers butchered this last week, definitely an experience.   Their butcher saved me all of the tallow.  So the next day, I went to their house again and rendered the tallow the old fashioned way, over an open fire.   I had some adjusting to do.  We started off with the fire underneath and had to move it to the side very quickly.  The fire was way too hot.  Even moving it to the side wasn't enough. We had to add a second set of cinder blocks to keep the pan high enough off of the flames.  I strained everything through a sieve, but it needed more straining.  I pulled out my soap crockpot, and yes I do mean out as in outside.  Lets just say that tallow that is not filtered is not an appealing smell.  I put a couple of inches of water in the bottom.  The sieve went onto the top of the crockpot with a coffee filter inside which I then filled with tallow.  The hot water keeps the tallow hot  enough to filter through the coffee filter.  As the crockpot fills up I dipped the hot, liquid tallow into another pot.  As soon as I get through all of the tallow I will be storing it in a 3 gallon (formerly icing) bucket in the refrigerator in our shed.  It is definitely not something I am in a hurry to do again, but it was a valuable experience.
Top of the peppermint soap as you can see I got a little ash

I made soap using
10 ounces beef tallow
6 ounces coconut oil 76*
4 ounces Rice Bran oil
4 ounces Grapeseed oil
9.1 ounces water
93.6 grams of sodium hydroxide (lye)

Peppermint Soap
I always measure the lye in grams to make it precise as possible.  As always if you want to use this recipe (feel free) please check it with a lye calculator like this one.  http://www.soapcalc.net/calc/soapcalcWP.asp  Measure everything out first, then add lye to the water (NEVER add the water to the lye).  After the lye has cooled to about 100* you can add it tho your melted oil mixture.

To the peppermint soap I added 1 TBS of peppermint essential oil.  The peppermint soap is colored with about 1 ounce of comfrey infused oil.  I should have used more comfrey oil.  I was hoping for a nice green, but I only got a greenish yellow.  I used a spoon to give the top of the soap a nice texture.


For the earl grey, I measured out 9 ounces of water and boiled 3 tea bags in it for a few minutes.  After cooling the tea and remeasuring the liquid due to volume lost during boiling I used the tea to make my lye water.  Be warned at first this will smell pretty awful, but the smell gets much better after a few days.  After a week or two the soap will smell delightful.  I did not add any other scents to the earl grey.  I did add a little titanium dioxide and activated charcoal to about 1/3 each.  Then I used squirt bottles to layer very thin layers ending with the titanium dioxide soap.  After I finished layering I swirled the soap with a skewer in a figure eight pattern.


I am linking with the following blogs:
http://back2basichealth.blogspot.com
http://www.create-with-joy.com
http://teachingwhatisgood.com/
http://cupcake-n-bake.blogspot.com
http://alifeinbalance.net
http://thediydreamer.com
http://www.the-chicken-chick.com
http://lavendergardencottage.blogspot.com
http://www.flusterbuster.com
http://www.time-warp-wife.blogspot.com
http://www.bystephanielynn.com
http://blackfoxhomestead.com/
http://www.iamannekehn.blogspot.com